A tiled wall can breathe new life in rooms like the bathroom or kitchen. With proper preparation, just about anyone can tile a wall. If you are willing to get your hands dirty, then read on to find out how you can tile your walls in easy, understandable steps.
Choose the Tiles First
This should be fun, right? Tiles vary in size, color, design, and price- you will be surprised at how such a fun activity would quickly turn into a dizzy affair. Not to worry, if you haven’t tiled before then consider an easy-going color with a straightforward pattern. More intricate patterns and shapes are available too- their overall effect could really change the outlook of the room, so you need to be cautious.
Here are common types of tiles and places that they are most suitable:
| Tile Material | Suitability |
|---|---|
| Granite | Countertops & High Traffic Areas |
| Ceramic & Porcelain | Bathrooms, Kitchens, Walls & Floors |
| Glass | Focus/Feature Walls, Mosaics, Low Traffic Floors |
| Travertine | Bathrooms, Kitchens, Walls & Floors |
| Terracotta | Walls & Floors in Dry Areas |
| Slate | Feature Walls & Floors & Countertops |
Buy Enough Tiles
To find out the number of tiles need to purchase, measure the wall area needed for tiling. The boxes of tiles should indicate the number of square meters the tiles will cover. It is important to add around 10% extra to cover for breakages,cuts, and other miscellaneous. While buying tiles, make sure they all have the same batch number to avoid minor variations in color and design.
Finding Adhesive, Grout, and Sealant
One of the most confusing aspects of tiling is finding the right adhesive to use. It is important to know when to use which type of adhesive since they will depend on the weight, type, as well as size of your tiles.
We recommend that you ask for professional advice to avoid any mistakes. Not all tiles will need a sealant, but natural stones and ceramic types will need a sealant. Grout is mostly used for filling gaps between the tiles or wall. You can choose your grouts to either match or contrast with your tiles outlook.
Not sure about how much grout you need? You can read our grout on how much grout you need for your project.
Prepare the Wall
Ensure the wall you will be tiling is clean and free from nails, dust, wallpapers, and holes. Fill all holes and if necessary re-plaster the wall to achieve an even surface. The wall should plastered well ahead of the tiling process to allow the plaster to dry.
Protect the Area
Add a protective covering on the floor and seal it with a masking tape. Using a clean damp piece of cloth, wipe your wall surface in vertical movements. Use a suitable cleaning agent such as sugar soap and wash the wall leaving it to dry for a while.
Remove any flaking that may have been left by the initial wall paint. Also, remove any existing tiles before placing new ones- the overall weight of the tiles would probably weaken the adhesive. Consider vacuuming the room to avoid any dust particles, unless you want your tiles to fall off.
Plan Ahead
The final outlook of the tiles will ultimately depend on how well you prepare your steps, so it is definitely worth taking your time to do some careful planning.
Once you have formulated a plan, design a nice tiling gauge rod. Place your tiles on a long stick and mark positions of each tile from end to end. Measure the dimensions of your wall and mark both the central, vertical , and horizontal line. A spirit level will be able to help you find the positions accurately.
Use your tilling stick to draw lines or points where you’ll place the tiles. For a more uniform look, try to place the cut tiles on the far edges of the wall.
Prepare the Adhesive
Mix the adhesive in a bowl or bucket as per the instructions in the packet. We prefer using a pre-mixed adhesive for smaller tiles, although in larger designs, mixing is done by the tilor. Once the adhesive is ready, use a notched spreader held at a forty-five degree angle to spread the adhesive onto the wall’s surface. Spread the adhesive across the wall and make sure the adhesive covers evenly right up the pencil outlines.
Batten Board
A batten board is a piece of board screwed into the wall to help support other tiles on top. It has many crews to keep it sturdy and starts at about 3 inches from the floor.
Start Tiling
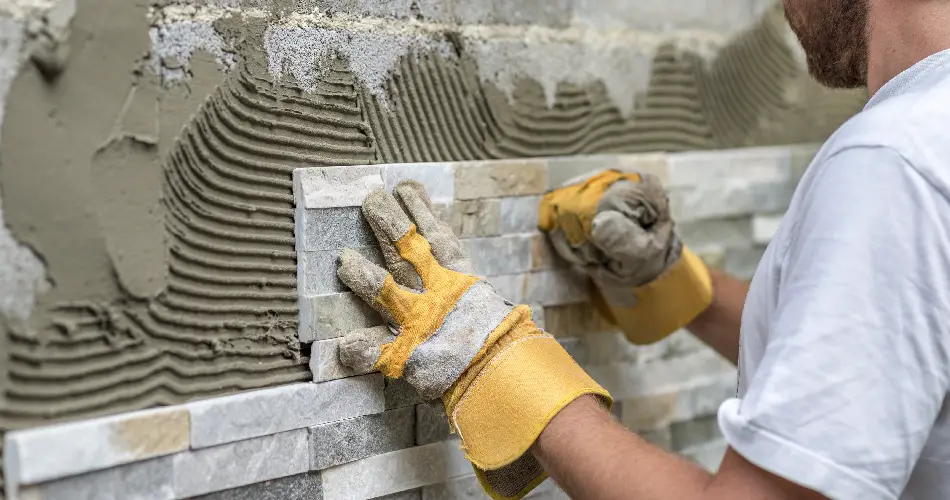
Now you’re ready to start tiling the wall. Start by placing the cut tiles on top of the batten board and push gently as you twist from left to right to make sure it sticks. Use a tile spacer as you place the tiles and wipe excess adhesive with a cloth. In inaccessible areas on the wall such as behind toilets, you can put adhesive on the tiles before placing them on the wall. Continue with the above steps until you finish the whole area.
Cut the Tiles
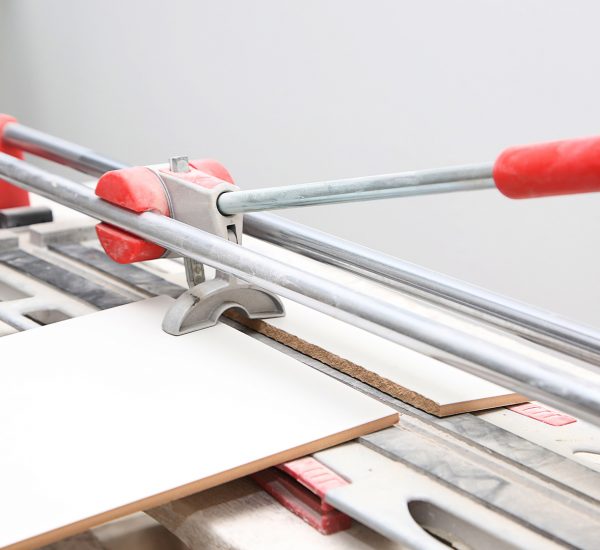
You may have to cut several tiles probably 20% of the whole pack. You have a plethora of options on how to cut a tile- we will leave you to decide on the best. The cut’s accuracy is paramount to how neat the tiles look. It is therefore important not to rush while cutting even if it means wasting a few tiles. Once you are done, smoothen any rough edges on the tile.
Cutting special curves will be a little tricky as compared to cutting them across. You need a little extra finessing skills to get the desired curves. For smaller shapes, draw the shape onto the tile using a chinagraph pencil. Slowly snip away the tile in small bits until you reach the desired shape. Always snip small bits since most tiles are brittle in nature.
For tiles that will go around a semicircular bulge (e.g a pipe) , mark vertical and horizontal tramlines on the pipe, which we will then transfer to the selected tile. Draw the lines further until they form a square, after which we will position the pipe. Use a dummy pipe to draw the actual pipe’s impression within the square we formed.
Once you have the circle in place, split the tile in half across the centre of that circle. Then use nippers to cut to half-circle shapes. When you join these two halves, there should be a perfectly fitting tile on the pipe. Just make sure your calculations and measurements are accurate. Tiling around a Focal Point Depending on which part of the room you’re tiling, placing tiles around a focal point is key. In the bathroom, it will be the bath or the window. For instance, while tiling around a window, make sure you use nicely cut tiles, so that the area looks aesthetically square.
Finishing the Tiles
Round-edge tiling strips should help finish the tiles in countertop edges, external corners or other appropriate areas. These strips should only be placed after fixing the tiles, but before grouting and sealing. Use a thin strip of adhesive to seal the edges. If you don’t have tiling strips, you could use silicone caulk on the edges of the tile to have a waterproof finish. It also looks better than raw tile edges.
Seal the Tiles
Once all the tiles (including cuts) are put in place, it is now time for sealing. Spread the sealant across all the tiles, applying each section at a time. Remember to work swiftly as the brush’s impression may show at the end of the process. Sealed tiles should take no more than 24 hours to dry up.
Grouting Tiles
Now that your sealant has dried, it is time to add some grout. Before grouting, make sure your tiles are nice and clean, and joints too. There should be no hanging adhesive on the tiles as it could contaminate the grout. Now you are ready to start applying the grout.
Start by placing grout from the bucket onto the rubber grout float using a bucket trowel. Once you have enough grout float, press against the tiles surface and start applying from left to right, then up and down. As you are spreading the grout, push it harder into the joints. One you are done, give the tiles a quick wipe and with a sponge of something similar with cold water, before moving to the next section. You’ll have to repeat this process severally in turns of 15 minutes.
We are almost there! The final step is to leave the files for about 30 minutes before buffing them with a dry cloth. The dry cloth will polish the tiles, leaving a reflective, shiny surface.
Your tiles should be good looking and ready to serve you for the next couple of years. With attentive care and maintenance, you should worry less about replacement. But you can easily replace a tile when necessary. You could also use nail varnish with matching colors to cover up nicks and scratches in tiles. In your next tiling project, you


