Choosing the right tiles for bathroom flooring is one of those decisions that looks simple on the surface but quickly reveals a surprising number of layers. Get it right and you have a floor that looks great, stays safe underfoot, and holds up for decades. Get it wrong and you could be dealing with cracked tiles, slippery surfaces, or grout that turns black within a year. This guide covers everything a homeowner or DIY enthusiast needs to know, from picking the right material and slip rating to laying the tiles themselves with professional results.
What Are Bathroom Floor Tiles?
Bathroom floor tiles are purpose-made hard flooring units designed to cope with the specific demands of a wet environment. Unlike general-purpose tiles, the best options for bathroom floors combine waterproofing, slip resistance, and durability in a way that standard flooring materials simply cannot match.
The three most common materials are porcelain, ceramic, and natural stone. Porcelain is the most popular choice for modern bathrooms due to its low water absorption rate and hardness. Ceramic is a slightly softer, more affordable alternative that works well in lower-traffic bathrooms. Natural stone options such as marble, slate, and travertine bring a premium aesthetic but require more maintenance.
It is also worth understanding the PEI rating system. This scale (0 to 5) measures a tile’s resistance to surface wear. Floor tiles should be rated PEI 3 or above. Wall tiles are typically rated PEI 0 to 2, which means they are not suitable for use on floors where foot traffic and cleaning will wear the surface down quickly.
How to Choose the Best Tiles for Bathroom Flooring
Slip Rating: Understanding R-Values
Slip resistance is non-negotiable for bathroom floors. The R-value system (R9 through R13) measures a tile’s resistance to slipping on a wet surface. For a standard bathroom floor, an R10 rating is the recommended minimum. R10 tiles provide adequate grip underfoot in normal wet conditions. For wet rooms, walk-in showers, or households with elderly or young family members, stepping up to R11 provides additional safety. R9 tiles are generally too smooth for bathroom floors and are better suited to dry indoor spaces.
Tile Size Versus Room Size
Larger tiles (600mm x 600mm and above) can actually make a small bathroom feel bigger by reducing the number of grout lines, which creates a cleaner, more expansive look. However, very large tiles require a perfectly level subfloor and more precise cutting around fixtures. For a small bathroom, 600mm x 300mm or 450mm x 450mm formats tend to strike a good balance between visual impact and practical installation.
Mosaic tiles (typically 25mm x 25mm to 100mm x 100mm) are excellent for shower trays and curved surfaces, as their small size allows them to follow contours and gradients more naturally.
Finish Types
Matte and textured finishes are the safest choices for bathroom floors as they provide better grip and hide water marks. Polished or high-gloss tiles look stunning but become extremely slippery when wet and show every footprint. Semi-polished or lappato finishes offer a middle ground with a subtle sheen that is more forgiving in wet conditions.
Best Tile Materials for Bathroom Floors: Pros and Cons
| Material | Durability | Water Resistance | Maintenance | Cost (per m²) |
|---|---|---|---|---|
| Porcelain | Excellent | Excellent (<0.5% absorption) | Low | £20–£80+ |
| Ceramic | Good | Good (3–6% absorption) | Low | £10–£40 |
| Marble | Good (with sealing) | Moderate (requires sealing) | High | £50–£150+ |
| Slate | Very Good | Good (with sealing) | Moderate | £30–£70 |
| Encaustic/Victorian | Good | Moderate | Moderate | £40–£100+ |
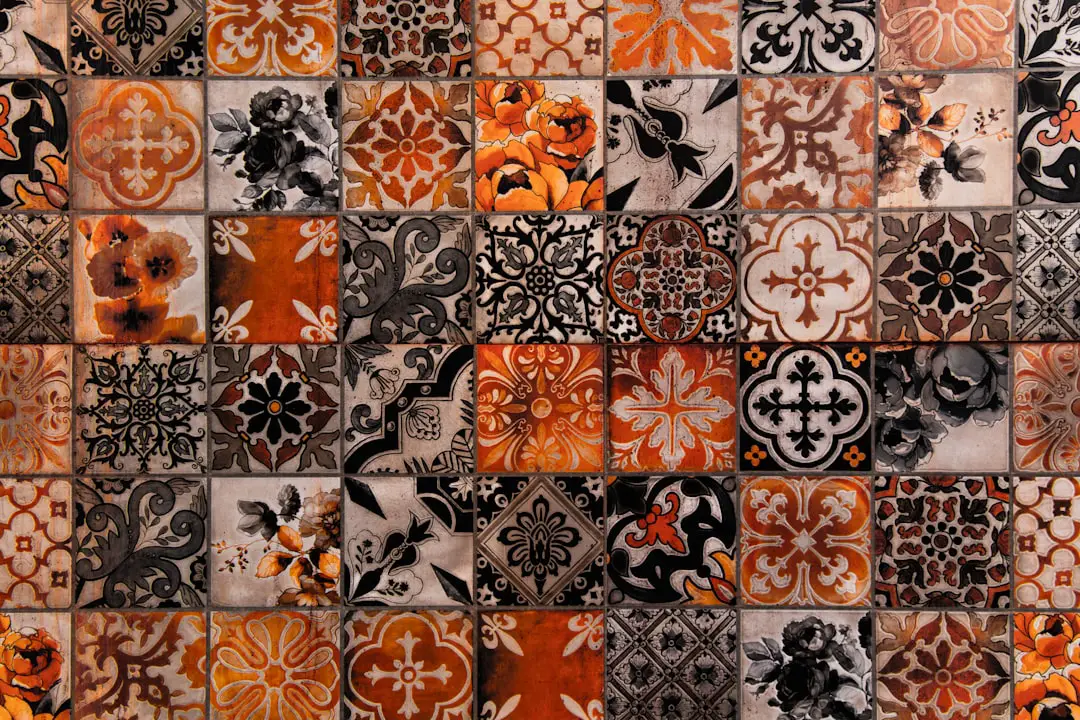
Encaustic and Victorian-style cement tiles are enjoying a strong revival for those wanting a characterful, patterned floor. They are porous and must be sealed before use, but the decorative results are hard to replicate with any other material.
How to Calculate How Many Bathroom Floor Tiles You Need
This is a step that catches many first-time tilers out. Here is a straightforward formula:
- Measure the length and width of the floor in metres.
- Multiply them together to get the floor area in square metres (m²).
- Add a waste allowance: 10% for a straightforward layout, 15% for diagonal or herringbone patterns, and up to 20% for complex or irregular rooms.
Worked example: A bathroom measuring 2.4m x 1.8m has a floor area of 4.32m². Adding a 10% waste allowance gives 4.32 x 1.10 = 4.75m². Round up to the nearest pack size, so order tiles covering at least 5m².
Always keep a small number of leftover tiles after the job is complete. If a tile chips or cracks in future, matching the exact tile from the same batch is far easier than trying to source a replacement years later.
How to Prepare Your Bathroom Subfloor Before Tiling
Subfloor preparation is the most overlooked step in DIY bathroom tiling, yet it is arguably the most important. Tiles laid on a poor subfloor will crack, lift, or allow movement that breaks down the grout over time.
- Timber floors: Check for flex by walking across the floor. Any noticeable bounce or movement must be addressed before tiling. Screw down any loose boards and consider laying a layer of 6mm or 12mm tile backer board (such as Hardiebacker or Wedi board) to create a rigid, moisture-resistant surface.
- Concrete floors: Check for cracks and level the surface with a floor levelling compound if there are dips greater than 3mm over a 2m span. Allow the compound to cure fully before tiling.
- Existing vinyl or tiles: If the existing floor is firmly bonded and level, it is possible to tile over it. However, check that the additional tile weight will not exceed the floor’s load capacity, particularly on upper floors.
Use a long spirit level or straight edge to check for high and low spots. A floor that is not flat will lead to lippage (where tile edges sit at different heights), which looks unprofessional and creates a trip hazard.
How to Lay Bathroom Floor Tiles: A Step-by-Step DIY Guide
- Find the centre point. Measure the room and snap chalk lines from the midpoint of each wall to find the centre of the floor. This ensures the tile layout is balanced and symmetrical.
- Do a dry lay. Place tiles out from the centre without adhesive to check how cuts will fall at the edges. Adjust the starting point slightly if a very thin cut would land in a prominent position.
- Mix your adhesive. Use a flexible, waterproof tile adhesive rated for floor use in wet areas. For porcelain tiles, a rapid-set flexible adhesive is recommended. Mix to a smooth, lump-free consistency.
- Apply adhesive. Spread adhesive using a notched trowel (10mm notch for most floor tiles). Apply adhesive to both the floor (bed) and the back of the tile (back-buttering) for full coverage, especially with large-format tiles.
- Lay the tiles. Press each tile firmly into position with a slight twisting motion. Use tile spacers to maintain consistent grout joints. Check frequently with a spirit level to ensure tiles are flat and even.
- Cut edge tiles. Use an electric tile cutter or a quality manual score-and-snap cutter for straight cuts. A diamond angle grinder is useful for notches around pipes and pedestals.
- Allow to cure. Leave the adhesive to cure for at least 24 hours (or as directed by the manufacturer) before walking on the floor or grouting.
- Grout. Remove spacers and apply grout using a rubber float, pressing it firmly into the joints at a 45-degree angle. Wipe away excess with a damp sponge before it hardens. Buff to a clean finish once dry.
- Seal the grout. Once fully cured (typically 48–72 hours), apply a grout sealer to protect against moisture and staining, particularly important in a bathroom environment.
Practical Considerations Before You Buy
Underfloor Heating Compatibility
Porcelain and ceramic tiles are excellent conductors of heat, making them ideal companions for underfloor heating (UFH) systems. Natural stone also conducts heat well. The key considerations are: use a flexible adhesive rated for use with UFH, and ensure the heating system is run through a commissioning cycle before tiling to allow any residual moisture in a screed to escape. Do not switch UFH on at full power immediately after tiling; bring the temperature up gradually over several days to prevent thermal shock cracking.
Rectified vs Non-Rectified Tiles
Rectified tiles have been precision-cut after firing to ensure perfectly uniform dimensions and sharp, straight edges. This allows them to be laid with very thin grout joints (as narrow as 2mm), creating a sleek, seamless appearance. Non-rectified tiles have slight size variations from the firing process and require wider grout joints (typically 3–5mm) to accommodate these differences. For large-format tiles on bathroom floors, rectified tiles are strongly recommended.
Colour and Design: Darker or Lighter Floors?
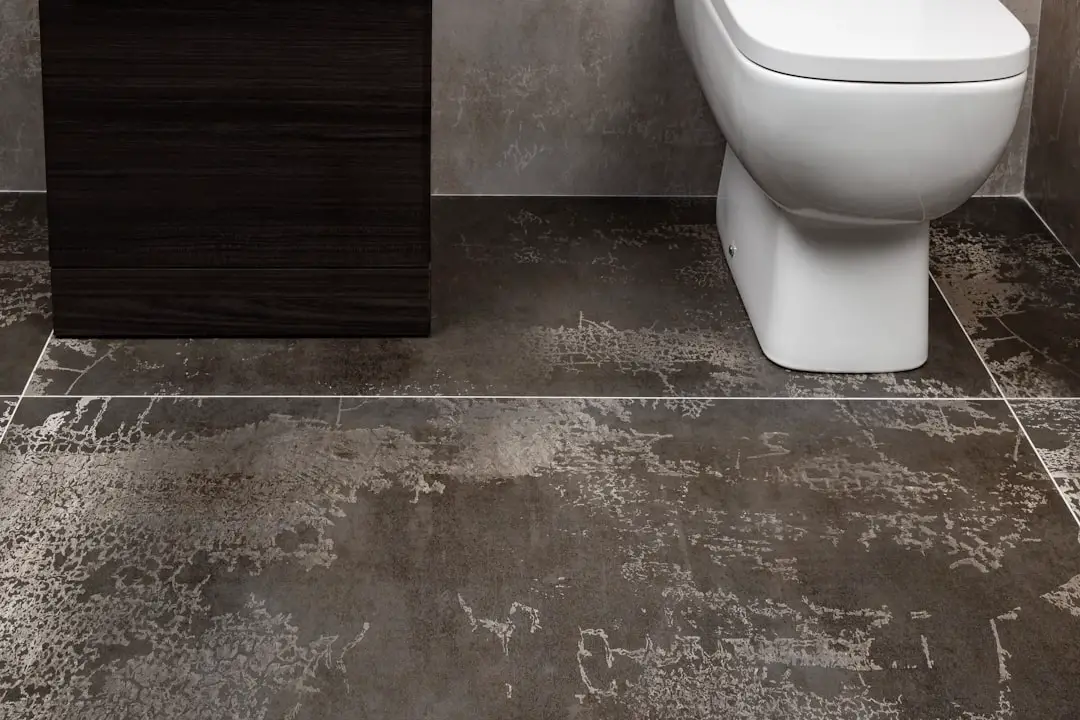
Light-coloured floor tiles reflect more light and can make a small bathroom feel more open and airy. However, they show dirt and watermarks more readily. Dark floor tiles add drama and warmth, and they hide grime better, but they can make a small bathroom feel heavier.
A popular approach is to use a lighter tone on the floor than the walls to ground the space without making it feel closed in. Contrasting grout (for example, dark grout with light tiles) adds graphic impact and is a strong current trend, though it requires more effort to keep clean than tone-on-tone grout.
Trending Bathroom Floor Tile Styles and Design Ideas
Bathroom tile design in 2026 is moving away from the all-white minimalist look towards more textured, characterful surfaces. Here are the styles generating the most interest:
- Terrazzo-effect tiles: The speckled, multi-tonal look of terrazzo is widely available in porcelain format, delivering a high-end aesthetic at a fraction of the cost of real terrazzo.
- Zellige-inspired tiles: Handmade-look tiles with irregular surfaces and rich earthy glazes are hugely popular for adding warmth and texture to bathroom floors.
- Large-format stone-look porcelain: Marble and travertine effects in 600mm x 1200mm formats continue to dominate, offering the look of natural stone without the maintenance demands.
- Encaustic geometric patterns: Bold geometric and Moorish-inspired patterns are a strong choice for smaller floors where the tile design becomes a feature in itself.
- Warm neutrals and earthy tones: Taupe, sand, warm grey, and terracotta tones are replacing cooler greys as the go-to neutral palette for bathroom floors.
Installation Tips: Adhesive, Grout, and Laying Patterns
The correct adhesive for bathroom floor tiles is a flexible, waterproof adhesive classified as C2TE S1 or higher under EN 12004. This classification indicates it is suitable for wet areas, has extended open time, and has some flexibility to accommodate minor movement. Avoid using standard wall tile adhesive on floors.
For grout, an epoxy grout offers superior stain and mould resistance compared to cement-based grout, and it is worth the extra cost in high-splash areas. For the rest of the floor, a quality flexible cement grout with an anti-mould additive is a practical choice.
Popular laying patterns include:
- Straight (grid): Clean and modern, easiest to install, works well with large-format tiles.
- Brick bond (offset): Each row is offset by half a tile, adding movement and interest. Suitable for rectangular tiles.
- Herringbone: A classic V-shaped pattern that adds significant visual interest but requires more cuts and increases waste by around 15%.
- Diagonal (45 degrees): Can make a narrow bathroom feel wider but produces the most offcuts and waste.
Common Bathroom Floor Tiling Mistakes (And How to Avoid Them)
- Skipping subfloor prep: Tiling over a flexible or uneven floor is the single most common cause of cracked and lifting tiles. Always fix the subfloor first.
- Not back-buttering large tiles: Failing to apply adhesive to the back of large tiles leaves voids beneath them, which can cause cracking and hollow spots. Full coverage is essential.
- Starting in the wrong place: Beginning from a corner often results in awkward, thin cuts in the most visible parts of the room. Always start from the centre or a focal point.
- Using the wrong adhesive: Standard multipurpose adhesive is not suitable for wet floors. Always check the product is rated for floor use in wet areas.
- Grouting too soon: Grouting before the adhesive has cured fully can cause tiles to shift. Follow the adhesive manufacturer’s recommended waiting time.
- Ignoring expansion gaps: Tiles expand slightly with temperature changes. Leave a small perimeter gap around the edges of the floor and fill it with flexible silicone rather than grout.
How to Keep Bathroom Floor Tiles Clean and Mould-Free
A regular, straightforward cleaning routine keeps bathroom floor tiles looking their best. Sweep or vacuum to remove grit (which can scratch tile surfaces), then mop with a pH-neutral tile cleaner diluted in warm water. Avoid acidic cleaners on natural stone as they will etch the surface.
Grout discolouration is the most common complaint. To prevent yellowing and mould growth, ensure the bathroom is well ventilated after bathing and dry the floor when possible. Apply a penetrating grout sealer annually to create a barrier against moisture and staining. For existing mould, a targeted grout cleaner or a paste of bicarbonate of soda and white vinegar applied with an old toothbrush can restore the colour effectively.
Frequently Asked Questions
What type of tile is best for a bathroom floor?
Porcelain is widely regarded as the best all-round choice for bathroom floors due to its low water absorption, hardness, and wide range of available finishes. It is durable, easy to maintain, and compatible with underfloor heating.
What slip rating do I need for bathroom floor tiles?
A minimum of R10 is recommended for standard bathroom floors. R11 is advisable for wet rooms, shower areas, and households with elderly residents or young children.
Should bathroom floor tiles be lighter or darker than the walls?
There is no strict rule, but a lighter floor with slightly darker walls is a popular choice that grounds the space without making it feel smaller. Ultimately, personal preference and the amount of natural light in the room should guide the decision.
Are bathroom floor tiles compatible with underfloor heating?
Yes. Porcelain and ceramic tiles are among the most efficient materials for use with underfloor heating due to their thermal conductivity. Use a flexible adhesive rated for UFH and bring the system up to temperature gradually after installation.
What is trending in bathroom floor tiles?
In 2026, terrazzo-effect porcelain, zellige-inspired textured tiles, large-format stone-look formats, and warm earthy tones are among the most popular choices for bathroom floors.
Can I use the same tiles on the floor and walls?
Floor tiles (PEI 3 or above) can generally be used on walls. However, wall tiles (PEI 0–2) should not be used on floors as they lack the hardness and wear resistance required for foot traffic. Always check the PEI rating and the manufacturer’s guidance before using any tile in a dual application.
Article written by Casper