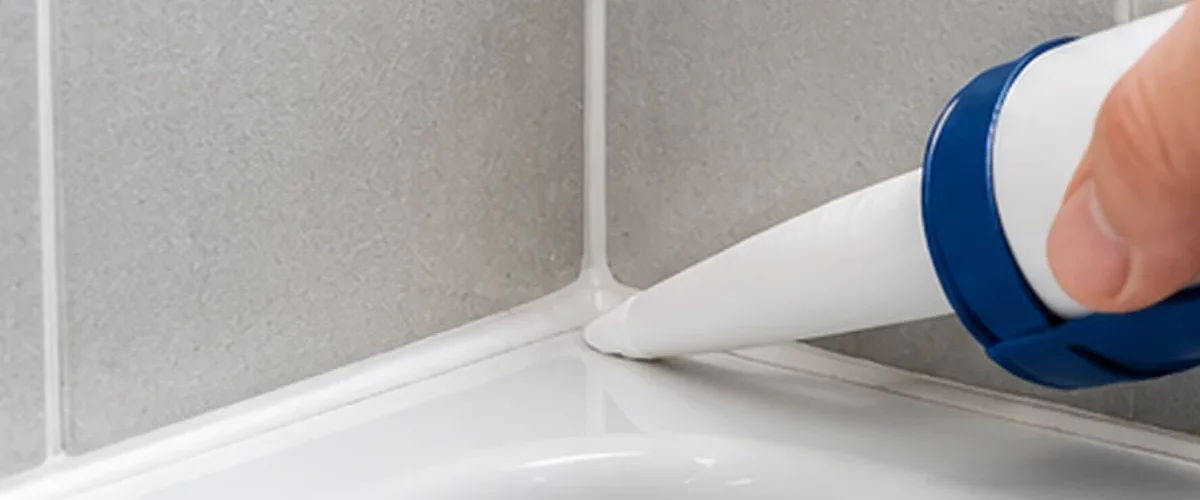
To replace bathroom silicone properly, remove the failed sealant, clean and dry the joint, then apply a compatible sanitary silicone in one continuous bead. The most important part is preparation: fresh silicone will not make a dependable seal over old silicone, trapped moisture or a dirty surface.
This guide covers the joint between tiles and a bath, shower tray or sanitary fitting. If water has already leaked behind the tiles, investigate that damage before resealing. Silicone is a flexible surface joint, not a substitute for a correctly installed shower waterproofing system.
When does bath or shower silicone need replacing?
Look for peeling edges, splits, gaps, persistent mould embedded within the sealant or sections that lift away when touched. Discolouration alone may not mean the bead has failed, but a gap that lets water pass through needs attention. Recurrent failure in the same place can indicate movement, insufficient support, poor preparation or an underlying leak.
Tools and materials
- Suitable sanitary silicone sealant compatible with your bath, tray, tiles and stone
- A silicone-removal tool or sharp scraper suited to the surface
- Manufacturer-approved silicone remover, where needed
- Clean cloths, gloves, and an appropriate degreaser or surface cleaner
- Sealant gun, masking tape and a suitable finishing tool
- Joint backing material if required by the joint design
Some sealants are acetoxy-curing and others neutral-curing. Natural stone and certain metals may need a non-staining neutral-cure product. Check the technical data sheet rather than relying only on a label saying ‘bathroom’.
Step 1: Remove the old silicone completely
Carefully slice along the upper and lower edges of the old bead and lift it away in sections. Work slowly near acrylic baths, shower trays and glazed surfaces—metal blades can scratch or gouge them. Use a compatible silicone remover for stubborn remnants if permitted by the surface manufacturer.
Do not apply fresh silicone over an existing bead. New silicone may not bond consistently to cured old silicone, leaving channels where water can enter.
Step 2: Clean, inspect and dry the joint
Remove all visible residue, soap deposits, dust and cleaning products. Wipe the surfaces with a cleaner approved by the manufacturer and allow them to dry thoroughly. Check that the bath or tray does not move excessively under load, and investigate softened boards, mould behind the joint or signs of water ingress.
Where a joint is unusually deep, the manufacturer may specify an appropriate backing material so the bead has the right shape and does not bond on three sides. Avoid overfilling a large void with silicone.
Step 3: Prepare the bath or shower tray
Follow the sanitaryware manufacturer’s fitting guidance. Some baths need to be supported or filled with water while sealing to account for movement under use; this is not a universal instruction for every bath and shower tray. Make sure the fitting is securely installed before proceeding.
Step 4: Mask the edges and cut the nozzle
If you want a crisp finish, apply masking tape on either side of the gap without covering the areas where silicone must adhere. Cut the cartridge nozzle at an angle to suit the joint width. It is easier to add a little more material than to clear a very thick bead.
Step 5: Apply an even silicone bead
Run the sealant gun steadily along the joint, maintaining enough pressure to fill it continuously without breaks. Work in manageable sections if the product has a short tooling time. Pay particular attention to junctions and corners, where thin spots are easy to leave.
Step 6: Tool the joint and remove tape
Use a manufacturer-approved finishing tool to shape a smooth, continuous bead that bonds to both sides of the joint. Avoid excessive smoothing agents or water unless the sealant manufacturer allows them; contamination can interfere with bonding. Remove masking tape while the silicone is still within its specified tooling window.
Step 7: Let the silicone cure before using the shower
Do not assume every silicone is ready for water after 24 hours. Skin formation and full cure are different. Cure time depends on the sealant chemistry, bead size, humidity, temperature and manufacturer instructions. Keep the seal dry and do not disturb it until the specified water-exposure time has passed.
Common mistakes to avoid
- Sealing onto damp surfaces: moisture or trapped soap film can prevent proper adhesion.
- Leaving old silicone behind: fresh sealant needs a suitable clean bonding surface.
- Using grout instead of silicone at movement joints: a hard joint can crack as the bath or walls move.
- Choosing the wrong product: natural stone and some materials require a suitable non-staining sealant.
- Rushing curing: water exposure before the allowed interval can compromise a new bead.
How long should bathroom silicone last?
There is no guaranteed lifespan. Ventilation, regular cleaning, joint movement, water exposure and the suitability of the product all affect longevity. Wipe away standing water, keep the bathroom ventilated and avoid abrasive cleaning tools that cut or lift the bead.
Frequently asked questions
Can I put new silicone over old silicone?
It is not recommended for a reliable joint. Completely remove the old bead and residue, clean and dry the surfaces, then apply new sealant.
Should I use grout or silicone between a bath and tiles?
The bath-to-tile joint normally needs an appropriately designed flexible seal, not a rigid grout line. Follow the installation system and sanitaryware manufacturer’s details.
Why is my new silicone peeling off?
Common causes include residue from the previous bead, soap, moisture, poor product compatibility, too much joint movement or incorrect joint geometry.
Can silicone stop a shower leak?
It can repair a failed surface seal when that is truly the source. It cannot repair defective tanking, damaged backer boards or a leaking waste pipe.
See also our guide on regrouting tiles to understand when hard grout needs replacing rather than flexible sealant.
Further reading: Mapei UK: Mapesil AC sanitary silicone; Mapei UK: Mapesil LM neutral-cure silicone.