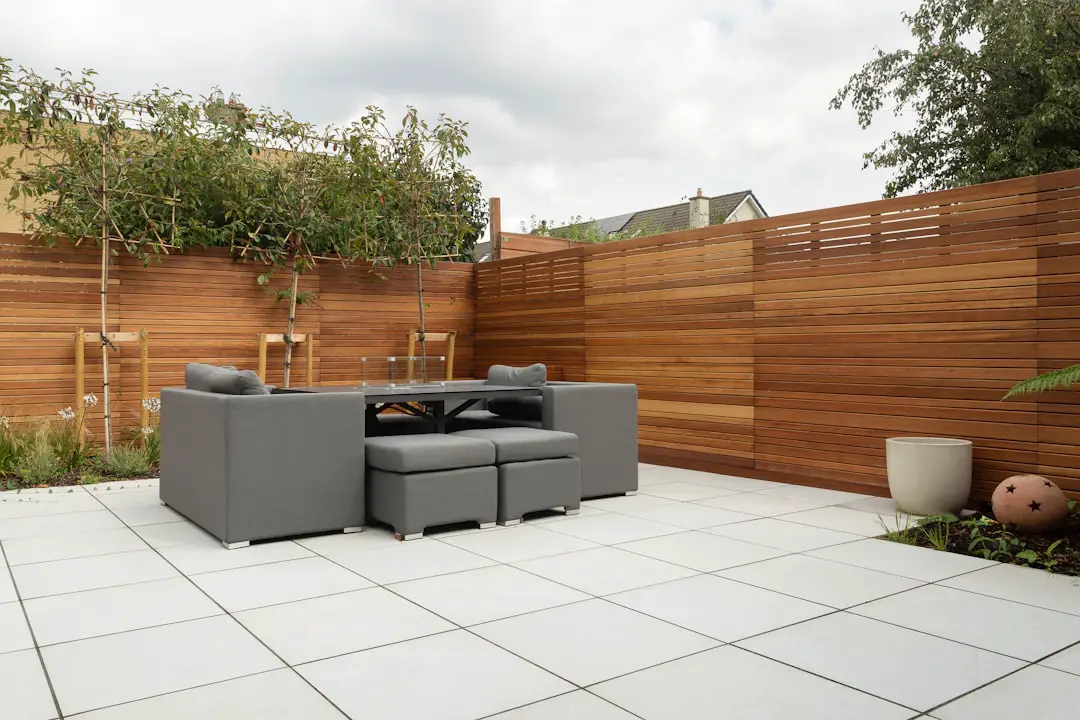
Outdoor tiling transforms a dull concrete slab or overgrown patio into a polished, functional space that adds real value to a home. Yet many DIY enthusiasts approach the project the same way they would an indoor job, and that is where things go wrong. Outdoor tiling has its own rules: different materials, different adhesives, different base requirements, and a healthy respect for the British weather. This guide covers everything needed to plan, lay, and maintain outdoor tiles like a professional, from choosing the right material to keeping tiles looking sharp through a UK winter.
What Is Outdoor Tiling and Where Can You Use It?
Outdoor tiling refers to the installation of hard surface tiles in external areas exposed to weather, foot traffic, and temperature change. Common applications include patios, garden paths, driveways, pool surrounds, steps, and balconies. Unlike indoor tiling, outdoor installations must cope with rain, frost, UV exposure, and in some cases the weight of vehicles.
Tiling is an excellent choice when durability and aesthetics matter equally. Compared to decking (which rots and splinters), gravel (which migrates), or block paving (which can look dated), quality outdoor tiles offer a sleek, low-maintenance finish that lasts decades when correctly installed. The key phrase there is “correctly installed” as this guide will keep returning to that point.
Best Materials for Outdoor Tiles: Porcelain, Natural Stone, and More
Material selection is the single most important decision in any outdoor tiling project. The wrong tile in the wrong location is a costly mistake.
Porcelain
Porcelain is the most popular choice for UK outdoor tiling, and for good reason. It is dense, virtually non-porous (water absorption below 0.5%), frost-proof, and available in a huge range of finishes including wood-effect, stone-effect, and concrete-look. Porcelain outdoor tiles are typically sold in 20mm thickness for patios and driveways, making them robust enough for heavy use. They require minimal maintenance and resist staining, algae, and moss better than most alternatives.
Natural Stone
Slate, sandstone, limestone, and granite all work well outdoors, offering a natural aesthetic that porcelain cannot fully replicate. However, natural stone is porous and must be sealed before and after installation. It is also more variable in thickness, which complicates laying on a perfectly level bed. Limestone and sandstone are softer stones that can be damaged by acidic cleaning products, so maintenance requires care. Granite is the most durable natural stone option and handles frost particularly well.
Ceramic
Standard ceramic tiles are generally not suitable for outdoor use in the UK. They are more porous than porcelain and typically lack the frost resistance needed to survive repeated freeze-thaw cycles. Some manufacturers produce specific outdoor-rated ceramic tiles, but always check the frost-resistance rating before purchasing.
Concrete and Composite
Concrete paving tiles are a budget-friendly option that works well for paths and patios, though they are heavier and less refined in appearance. Composite tiles (a blend of stone and resin) are increasingly popular for decked areas and balconies due to their lightweight properties.
| Material | Frost Resistant | Porosity | Durability | Maintenance | Cost Range (per m²) |
|---|---|---|---|---|---|
| Porcelain | Yes | Very Low | Excellent | Low | £20–£80 |
| Granite | Yes | Low | Excellent | Low-Medium | £40–£100 |
| Sandstone | Moderate | High | Moderate | High | £25–£60 |
| Slate | Yes | Low-Medium | Good | Medium | £30–£70 |
| Ceramic (outdoor-rated) | Sometimes | Medium | Moderate | Low | £15–£45 |
How to Choose the Right Outdoor Tile: Thickness, Size, and Slip Rating
Thickness
Tile thickness directly affects structural performance. For pedestrian-only areas such as patios and garden paths, a minimum of 10mm is acceptable, though 12mm is more common and provides better durability. For driveways or areas where vehicles will park or drive, 20mm porcelain tiles are the standard recommendation. Using thinner tiles in vehicular areas risks cracking under load.
Size and Layout
Larger format tiles (600x600mm, 600x900mm, or 900x900mm) create a contemporary look and reduce the number of grout lines, which can be easier to maintain. However, larger tiles require a flatter, more precisely prepared base. Smaller tiles (300x300mm or 450x450mm) are more forgiving on slightly uneven surfaces and are well-suited to curved paths or smaller patios.
When calculating how many tiles are needed, measure the total area in square metres, then add 10% for cuts and breakages. For example, a 20m² patio requires 22m² of tiles. Always order from the same batch to ensure colour consistency.
Slip Rating
Slip resistance is non-negotiable for outdoor use. Two rating systems are commonly referenced:
- R-Rating (DIN 51130): Ranges from R9 to R13. R9 is suitable for dry areas with low slip risk; R10 is the minimum recommended for most outdoor patios; R11 or higher is appropriate for pool surrounds, steps, and areas regularly wet.
- PTV (Pendulum Test Value): A PTV of 36 or above is considered low slip risk. For outdoor areas, aim for PTV 45 or higher.
Always check the tile’s technical data sheet before purchasing. A tile that looks textured is not necessarily slip-resistant by the required standard.
Can You Use Indoor Tiles Outside?
This is one of the most common questions in outdoor tiling, and the short answer is: generally, no. Indoor tiles are typically more porous, lack frost resistance, and often have a lower slip rating. Water absorbed into a porous tile during winter will expand as it freezes, causing the tile to crack or spall from within. This process, known as freeze-thaw cycling, can destroy an entire patio over a single cold season.
Some manufacturers offer matching indoor and outdoor ranges, where the outdoor version is thicker, frost-resistant, and carries an appropriate slip rating. These are safe to use and create a seamless visual flow between interior and exterior spaces. Always verify the outdoor-specific product code rather than assuming the indoor tile can be used outside.
How to Prepare the Base for Outdoor Tiling
A solid, stable base is the foundation of a long-lasting outdoor tile installation. No adhesive or grout can compensate for a poorly prepared sub-base.
Concrete Slab Base
An existing concrete slab is the most straightforward base for outdoor tiling, provided it is structurally sound, free of cracks, and level. Check the slab for hollow areas by tapping across the surface. Any loose or crumbling sections must be repaired before tiling begins. Apply a suitable primer or slurry bonding agent to improve adhesion between the concrete and the tile adhesive.
Hardcore and Sand Bed
For new installations without an existing slab, a compacted hardcore sub-base (typically 100–150mm deep) topped with a concrete screed is the standard approach. This is appropriate for patios and paths. The screed must cure fully before tiling begins, which typically takes 28 days for a fresh concrete pour.
Pedestal Systems
Adjustable pedestals are increasingly popular for balconies, roof terraces, and raised decking areas. Tiles sit on adjustable plastic supports, allowing for easy levelling and access to drainage or services below. Pedestal systems require tiles of at least 20mm thickness and a minimum size of 400x400mm to span the supports safely.
Planning Drainage Falls for Your Outdoor Tile Project
Water must drain away from the tiled surface, not pool on it. Standing water leads to algae growth, freeze-thaw damage, and potential flooding of adjacent structures. The standard drainage fall for outdoor tiling is 1:80, meaning the surface drops 1mm for every 80mm of horizontal distance. In practical terms, a 4-metre-wide patio should fall approximately 50mm from one side to the other.
To achieve this, set the fall during the base preparation stage rather than trying to compensate with adhesive thickness. Use a long spirit level and a straight edge to check the gradient across the full area before laying a single tile. Mark the highest and lowest points clearly. On a patio adjacent to a house, the fall should always run away from the building. Check that the drainage direction leads to a suitable outlet, such as a channel drain, soakaway, or planted border, not towards a neighbour’s property or a solid wall.
Step-by-Step: How to Lay Outdoor Tiles
Step 1: Gather Materials and Mark Out the Area
Dry-lay a row of tiles across the area to plan the layout and minimise cut tiles at the most visible edges. Snap chalk lines to guide the first row.
Step 2: Mix the Adhesive
Use a flexible, frost-resistant adhesive classified as C2 FE S1 or S2 (explained in the next section). Mix to a smooth, lump-free consistency following the manufacturer’s instructions. Do not mix more than can be used within the open time stated on the packaging, typically 30–45 minutes.
Step 3: Apply Adhesive and Back-Butter
Spread adhesive onto the base using a notched trowel, combing it in one direction. Then apply a thin layer of adhesive to the back of the tile itself. This technique, known as back-buttering, ensures full bed coverage and eliminates voids beneath the tile that could lead to cracking or hollow spots. Full bed coverage of at least 95% is essential for outdoor tiles.
Step 4: Lay the Tiles
Press each tile firmly into position using a rubber mallet and slight twisting motion to collapse the adhesive ridges. Use tile spacers to maintain consistent joint widths. For outdoor use, a minimum 3mm joint is recommended, though 5–10mm is common for natural stone or larger format tiles. Check levels constantly using a spirit level.
Step 5: Grout and Finish
Allow the adhesive to cure fully before grouting, typically 24–48 hours. Apply an outdoor-rated grout using a grout float, pressing it firmly into the joints. Remove excess grout with a damp sponge before it sets. For natural stone, seal the tiles before grouting to prevent staining, then seal again after grouting has cured.
Outdoor Tile Adhesive and Grout: What to Use and Why It Matters
Standard indoor tile adhesive will fail outdoors. Outdoor installations require a flexible, frost-resistant adhesive classified to EN 12004 standards. Look for the following classifications on the packaging:
- C2: Improved cementitious adhesive with higher bond strength
- F: Fast-setting (useful in cooler temperatures)
- E: Extended open time (helpful for large format tiles)
- S1 or S2: Flexible or highly flexible, essential for outdoor thermal movement
For grout, standard unsanded grout is not suitable for outdoor joints. Use a wide-joint or anti-frost grout rated for exterior use. Epoxy grout is an excellent choice for pool surrounds and areas exposed to chemicals or heavy staining, though it is harder to apply and more expensive.
Common mistakes include using indoor adhesive outdoors, applying adhesive too thinly, allowing adhesive to skin over before placing the tile, and using a grout with insufficient flexibility. Any of these errors can result in tiles lifting, cracking, or grout crumbling within a single season.
Outdoor Tiling Tools and Materials Checklist
Before starting, gather everything needed. Running to a supplier mid-project wastes time and can cause adhesive to dry out mid-lay.
Tools
- Tape measure and chalk line
- Long spirit level (1.2m or longer)
- Notched trowel (10mm notch for standard tiles; 12mm for large format)
- Rubber mallet
- Tile spacers (3mm, 5mm, or 10mm depending on joint width)
- Angle grinder with diamond blade (for cutting)
- Tile wet saw (for precision cuts, especially natural stone)
- Grout float
- Bucket and paddle mixer
- Sponges and clean cloths
- Knee pads
- Safety glasses and gloves
Materials
- Outdoor tiles (area + 10% wastage)
- Flexible frost-resistant tile adhesive (C2 FE S1/S2)
- Outdoor grout (wide-joint or anti-frost rated)
- Primer or slurry bonding agent
- Tile sealer (for natural stone)
- Grout sealer
- Expansion joint material or flexible silicone sealant
How to Protect Outdoor Tiles Through UK Winters
The UK climate varies considerably by region. Northern England, Scotland, and Wales experience more frequent and severe frost than the south-east, but no part of the UK is immune to freeze-thaw damage if tiles are poorly specified or maintained.
Before winter, carry out the following checks:
- Inspect all grout joints for cracks or gaps and repair with a suitable exterior grout or flexible sealant before water can penetrate
- Re-seal natural stone tiles if the sealer is more than 12 months old
- Clear drainage channels and check that the surface fall is still directing water away effectively
- Remove any organic debris such as leaves, which hold moisture against the tile surface
During winter, avoid using rock salt or harsh de-icers on tiled surfaces. Salt accelerates freeze-thaw damage and can stain or etch natural stone. Use a plastic shovel rather than metal to remove snow, and consider a propylene glycol-based de-icer if absolutely necessary.
In areas of the UK prone to prolonged frost, choosing a porcelain tile with a water absorption rate below 0.1% provides the greatest protection against freeze-thaw cycling. This information is available on the product’s technical data sheet.
How Long Do Outdoor Tiles Last? Lifespan by Material
When correctly installed and maintained, outdoor tiles are one of the most durable surface choices available. Lifespan varies by material:
| Material | Expected Lifespan | Key Lifespan Factors |
|---|---|---|
| Porcelain | 30–50+ years | Base quality, correct adhesive, frost spec |
| Granite | 50+ years | Sealing, base stability |
| Sandstone | 15–25 years | Regular sealing, acid-free cleaning |
| Slate | 25–40 years | Quality of stone, sealing frequency |
| Limestone | 15–30 years | Sealing, avoiding acidic products |
| Concrete tiles | 20–30 years | Base preparation, sealing |
Many premium porcelain tile manufacturers offer warranties of 10–25 years, which gives an indication of expected performance. However, warranties typically require correct installation and maintenance to remain valid, so keep records of products used and installation dates.
How to Clean and Maintain Outdoor Tiles
Regular cleaning extends tile life and maintains appearance. For routine maintenance, a stiff brush and warm soapy water is sufficient. For more stubborn issues:
- Algae and moss: Apply a proprietary patio cleaner or diluted bleach solution (1:10 with water), leave for 20–30 minutes, then scrub and rinse thoroughly. Avoid bleach on natural stone.
- Efflorescence (white salt deposits): Use a diluted acid-based cleaner specifically formulated for tiles. Always test on a small hidden area first and neutralise with clean water afterwards.
- Oil and grease: Apply a degreaser, leave to dwell, then scrub and rinse. Repeat if necessary.
Natural stone tiles should be re-sealed annually or when water no longer beads on the surface. Use an impregnating sealer appropriate for the stone type, applied to a clean, dry surface.
Should You Tile Outdoors Yourself or Hire a Professional?
Outdoor tiling is within reach of a competent DIYer, but it is more demanding than indoor tiling. Use the following framework to decide:
DIY is a good option when:
- The area is straightforward in shape with few cuts required
- A solid concrete base already exists and is in good condition
- The project is a patio or path (not a driveway or pool surround)
- There is time to work carefully and methodically without rushing
Consider hiring a professional when:
- The area requires significant base preparation or a new concrete pour
- The project involves complex cuts, steps, or multiple levels
- The area will be used by vehicles (20mm driveway tiling requires precise installation)
- The project is a pool surround where drainage and slip safety are critical
A professional tiler in the UK typically charges £150–£250 per day, with most outdoor projects requiring 2–5 days of labour depending on size and complexity. DIY saves on labour costs but requires investment in tools, particularly a quality wet saw or angle grinder for cutting porcelain.
Outdoor Tiling Costs: What to Budget Per Square Metre
A realistic budget helps avoid mid-project surprises. Here is a breakdown of typical UK costs:
- Porcelain tiles: £20–£80 per m²
- Natural stone tiles: £25–£100 per m²
- Flexible outdoor adhesive: £8–£15 per 20kg bag (covers approximately 3–4 m²)
- Outdoor grout: £5–£12 per kg
- Base preparation (new concrete screed): £40–£80 per m² including labour
- Labour (tiler day rate): £150–£250 per day
- Sealer (natural stone): £15–£40 per litre
For a DIY project on an existing concrete base, the total material cost for a mid-range porcelain patio typically falls between £35 and £100 per m², depending on tile choice. A professionally installed project including base preparation can reach £150–£250 per m² all-in.
Common Outdoor Tiling Problems and How to Fix Them
- Tiles lifting or hollow spots: Usually caused by insufficient adhesive coverage or voids beneath the tile. Lift the affected tiles, remove old adhesive, and relay with full bed coverage and back-buttering.
- Cracking: Can result from movement in the base, insufficient expansion joints, or tiles that are too thin for the application. Identify and address the root cause before replacing cracked tiles.
- Grout crumbling: Caused by using an unsuitable grout, joints that are too narrow, or water ingress. Rake out the old grout and apply an exterior-rated replacement.
- Frost damage (spalling or flaking): Indicates the tile was not frost-rated or water penetrated through failed grout joints. Replace affected tiles with frost-resistant alternatives and address drainage issues.
- Staining: Often from organic matter, rust, or efflorescence. Use the appropriate specialist cleaner for the stain type, and seal tiles to prevent recurrence.
Outdoor Tiling FAQs
Can you tile over existing concrete outdoors?
Yes, provided the concrete is structurally sound, free of cracks, and reasonably level. Tap across the surface to check for hollow areas and repair any damage first. Apply a bonding primer before laying tiles. If the concrete is cracked, crumbling, or uneven by more than 10mm, a new screed or overlay may be needed.
What type of tile is best for outdoor use?
Porcelain is the most widely recommended material for outdoor tiling in the UK due to its frost resistance, low porosity, durability, and low maintenance requirements. For a natural aesthetic, granite is an excellent alternative.
What adhesive and grout should I use for outdoor tiling?
Use a flexible, frost-resistant adhesive classified as C2 FE S1 or S2. For grout, choose an exterior-rated wide-joint grout or epoxy grout for pool surrounds and high-exposure areas.
How much does outdoor tiling cost per square metre in the UK?
Material costs range from approximately £35 to £100 per m² for a DIY project. Professionally installed, including base preparation, expect £150–£250 per m² all-in.
What is the lifespan of outdoor tiles?
Porcelain tiles can last 30–50 years or more with correct installation. Natural stone varies from 15 years (softer stones like sandstone) to 50+ years (granite), depending on maintenance and sealing.
What are the most common outdoor tiling problems and how do I fix them?
The most common issues are hollow or lifting tiles (caused by poor adhesive coverage), cracking (from base movement or insufficient thickness), and grout deterioration (from using indoor-rated products). Each can be fixed by addressing the root cause and relaying or re-grouting the affected area with the correct materials.
Outdoor tiling is a rewarding project that, when approached with the right knowledge and materials, delivers a finish that stands up to decades of use and British weather alike. Take time with the base preparation, choose materials rated for outdoor use, and work methodically through the installation. The result is a space that looks professional and performs reliably for years to come.
Article written by Casper