Underfloor heating has moved firmly into the mainstream. What was once a luxury reserved for high-end new builds is now a realistic upgrade for homeowners tackling bathroom renovations, kitchen refits, and open-plan living spaces. And when it comes to pairing underfloor heating with tiled floors, the results can be genuinely transformative: warm surfaces underfoot, no bulky radiators to work around, and even heat distribution across the entire room.
But getting it right requires more than simply buying a heating mat and laying tiles on top. The wrong adhesive, missing expansion joints, or a poorly prepared substrate can lead to cracked tiles, cold spots, or a system that never performs as it should. This guide covers everything a homeowner or DIY tiler needs to know, from choosing the right system to the specific tiling techniques that keep everything intact for decades.
What Is Underfloor Heating and How Does It Work?
Underfloor heating (UFH) distributes warmth across the entire floor surface, which then radiates heat upward into the room. Unlike radiators, which heat the air near a single point and rely on convection to circulate warmth, UFH creates a much more even temperature gradient. The floor stays consistently warm, and the heat rises gently through the room rather than creating hot and cold zones.
There are two main types of underfloor heating systems: electric (sometimes called dry systems) and water-based (wet or hydronic systems). Both work on the same principle but differ significantly in how they are installed, what they cost, and where they are best suited.
Electric vs Water Underfloor Heating: Which Is Right for You?
Choosing between electric and water underfloor heating usually comes down to the scale of the project, the existing heating infrastructure, and the budget available.
Electric Underfloor Heating
Electric systems use a heating mat or loose cable laid directly beneath the floor covering. They are relatively straightforward to install, making them a popular choice for DIY projects and single-room retrofits. A bathroom or kitchen renovation is an ideal scenario: the mat goes down, tiles go on top, and the system connects to a dedicated thermostat. Installation costs are lower upfront, and the systems can be operational the same day they are installed.
The trade-off is running cost. Electric UFH uses electricity directly, which is more expensive per kilowatt-hour than gas. For a small bathroom used intermittently, this is rarely a problem. For heating an entire ground floor, the running costs can become significant without smart controls.
Water Underfloor Heating
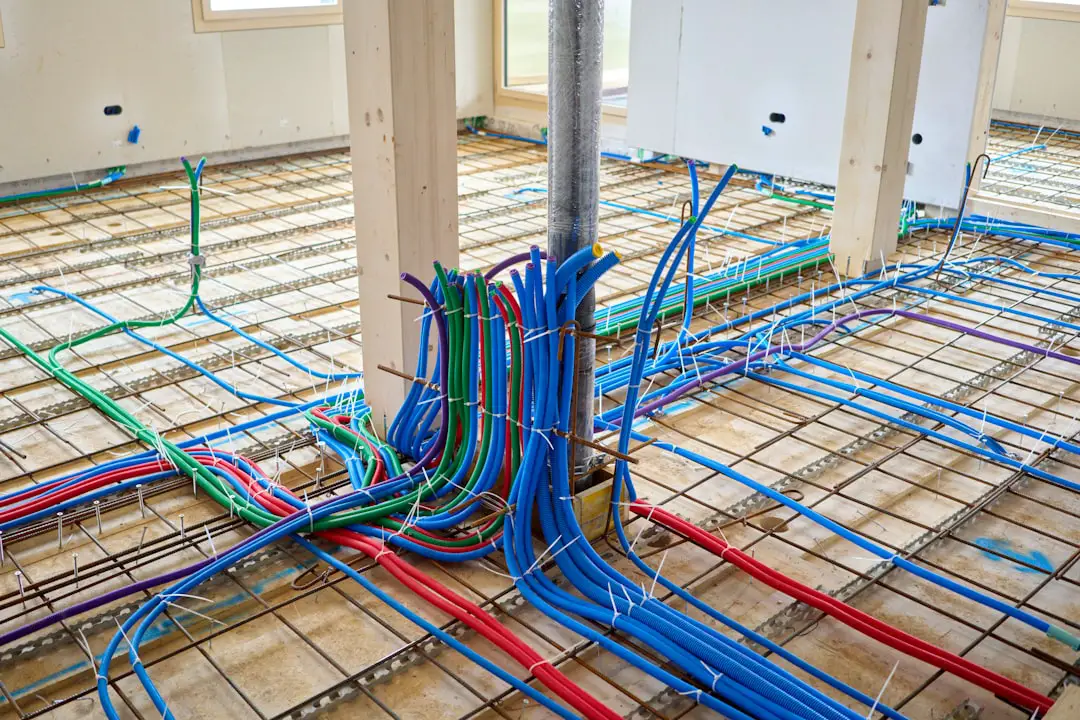
Wet systems circulate warm water through a network of pipes embedded in screed or a low-profile system board. They connect to the central heating boiler or, increasingly, a heat pump. Running costs are considerably lower than electric systems over time, and they are far more efficient when used as the primary heat source for a whole house or large open-plan space.
The installation is more complex and typically requires a professional plumber. Wet systems are best suited to new builds or major renovations where the floor can be properly built up from scratch. They are not generally practical as a quick retrofit unless the floor is being completely replaced.
Is Underfloor Heating Compatible with Your Floor Type?
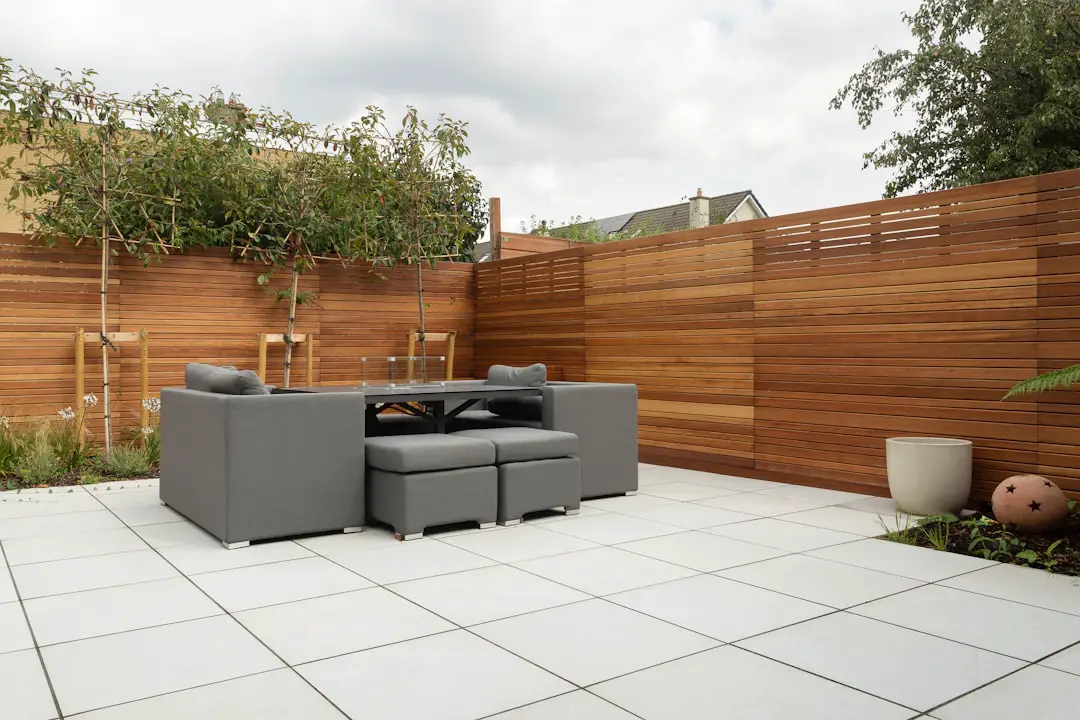
Not every floor covering works equally well with underfloor heating, and this is where tilers have a significant advantage: tiles are the single best floor covering for UFH performance.
Best Tile Types for Underfloor Heating
Porcelain and ceramic tiles conduct heat extremely well and have very low tog ratings (the measure of thermal resistance). Heat passes through them quickly and efficiently, meaning the system reaches the target temperature faster and uses less energy to maintain it. Porcelain is particularly well suited because of its density and low water absorption.
Natural stone tiles (slate, travertine, limestone, marble) also perform well thermally, though they require careful handling. Some natural stones are sensitive to temperature fluctuations and may need a more flexible adhesive system to prevent stress cracking. Always check the stone supplier’s recommendations before installing over UFH.
Floor Coverings to Avoid or Treat with Caution
Thick carpets and rugs with high tog ratings significantly impede heat transfer. Solid wood flooring can warp or gap if the system is not carefully managed. Laminate and engineered wood can work but require the system to be run at lower temperatures. For anyone specifically tiling a floor, this is not a concern, but it is worth knowing if other rooms in the project have different floor coverings.
How to Install Underfloor Heating Under Tiles
Substrate and Insulation Board Preparation
A solid, level substrate is essential before any UFH installation. The floor must be clean, structurally sound, and free from movement. Any flex in the substrate will eventually cause tiles to crack, and this risk is amplified by the thermal cycling of an underfloor heating system.
Insulation boards are not optional. Without them, heat escapes downward into the subfloor rather than rising into the room. Purpose-made UFH insulation boards (typically polystyrene-based or composite thermal boards) reflect heat upward and significantly improve system efficiency. In a retrofit situation on a timber floor, a 6mm or 10mm thermal board is often used to keep the floor build-up as low as possible. On a concrete subfloor, a thicker board can be used where height allows.
Laying the Heating Mat or Pipe
Electric heating mats should be laid according to the manufacturer’s layout plan. The mat should never overlap, and the cable must not be cut. Leave the sensor cable accessible and position the floor sensor between two cable runs, roughly 500mm from the wall, in a conduit so it can be replaced if needed without lifting tiles.
For wet systems, pipes are clipped into the insulation board or laid within a screed system. Pipe spacing and layout should be designed to provide even coverage, with closer spacing near external walls and doors where heat loss is greatest.
Choosing the Right Tile Adhesive and Grout for Underfloor Heating
This is one of the most important decisions a DIY tiler will make, and it is consistently overlooked in general UFH guides. Standard rigid tile adhesives are not suitable for use over underfloor heating. As the system heats and cools through daily cycles, the floor expands and contracts slightly. A rigid adhesive cannot accommodate this movement and will eventually debond or cause tiles to crack.
The correct choice is a flexible, polymer-modified tile adhesive. These are classified by their deformability rating: S1 adhesives offer moderate flexibility and are suitable for most electric UFH installations under ceramic or porcelain tiles. S2 adhesives offer greater deformability and are recommended for large-format tiles, natural stone, or wet pipe systems where temperature cycling is more pronounced.
When selecting grout, the same principle applies. A flexible, polymer-modified grout will accommodate minor movement without cracking. Standard cementitious grout used over UFH can develop hairline cracks over time as the floor moves. Epoxy grouts are highly durable and work well in wet areas like bathrooms, though they require careful application and are less forgiving to work with.
Always check that both the adhesive and grout are explicitly rated for use with underfloor heating. Reputable manufacturers will state this clearly on the packaging.
Why Expansion Joints Are Essential When Tiling Over Underfloor Heating
Thermal expansion is a physical reality that cannot be designed out of a tiled floor over UFH. As the system heats up, the tiles, adhesive, and substrate all expand slightly. When the system cools, they contract. Over hundreds of heating cycles, this movement accumulates. Without adequate provision for that movement, tiles will crack, grout will crumble, or tiles will tent (lift from the substrate).
Expansion joints (also called movement joints) must be incorporated into any tiled floor over underfloor heating. The general rule is to place perimeter movement joints around the entire edge of the tiled area, where the tiles meet walls, upstands, or fixed objects. These joints should be filled with a compressible, flexible sealant rather than grout.
For larger tiled areas, intermediate movement joints are also required. As a guideline, intermediate joints should be placed at no more than 8 metres in each direction for internal floors, though this reduces in areas of higher thermal stress. Always refer to the British Standard BS 5385 for specific guidance.
The joint width, typically 6mm to 10mm, should be filled with a silicone or polyurethane sealant that matches the grout colour as closely as possible. This is a small visual compromise that prevents a much larger and more expensive problem down the line.
Tiling Over Underfloor Heating: A Step-by-Step Checklist
This checklist is designed specifically for the tiler, covering the stages from substrate preparation through to commissioning the finished floor.
- Confirm the subfloor is structurally sound, level, and free from movement or contamination.
- Install insulation boards appropriate for the floor type and available height.
- Lay the heating mat or pipe system according to the manufacturer’s plan, avoiding overlaps.
- Position the floor sensor in a conduit between cable runs, approximately 500mm from the wall.
- Test the heating system electrically before tiling begins. Record the resistance reading and keep it for your records.
- Do NOT switch the heating system on before or during tiling. The system must be cold throughout installation.
- Apply a flexible, polymer-modified S1 or S2 tile adhesive, back-buttering large-format tiles for full coverage.
- Install perimeter movement joints around all fixed edges before laying tiles.
- Plan intermediate expansion joints for areas exceeding 8 metres in any direction.
- Allow the adhesive to cure fully according to the manufacturer’s instructions (typically 24 to 48 hours minimum).
- Apply flexible, polymer-modified grout. Fill movement joint positions with matching silicone sealant, not grout.
- Allow grout and sealant to cure fully before commissioning the heating system.
- Commission the system gradually: begin at a low temperature (around 15°C) and increase by no more than 5°C per day until the desired operating temperature is reached.
Thermostats and Controls: Getting the Most from Your System
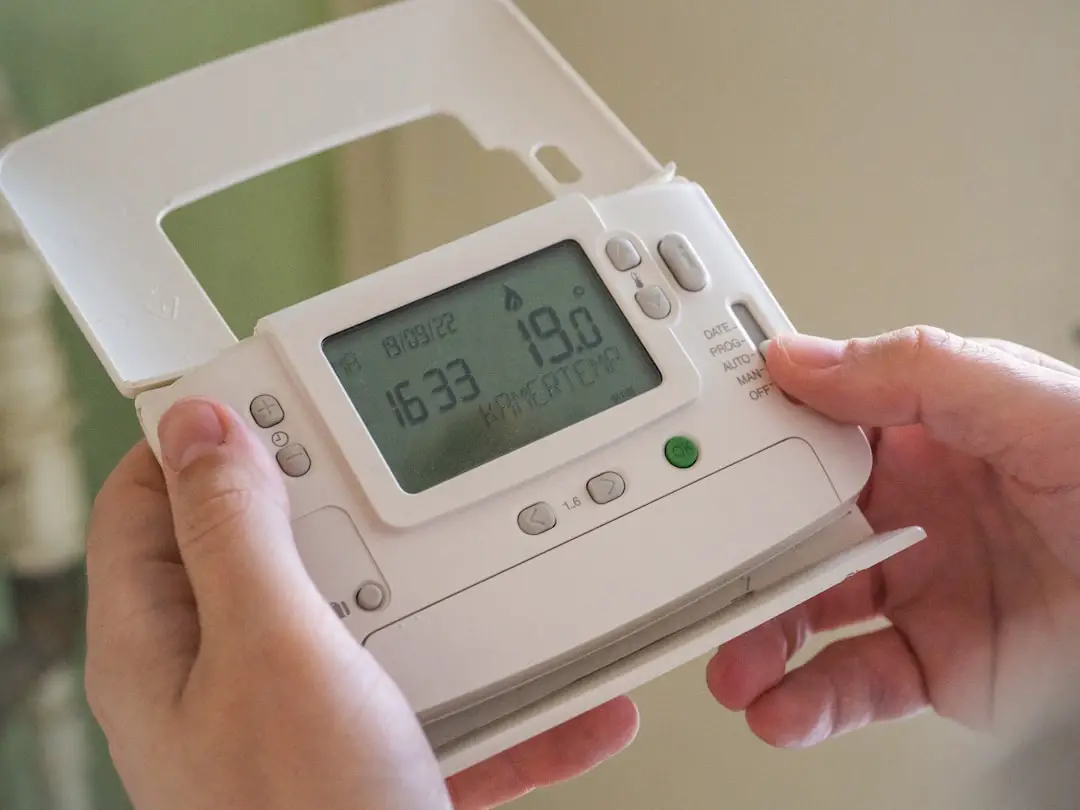
A thermostat is not just an on/off switch for underfloor heating. It is the primary tool for managing running costs and comfort. All UFH installations should include a floor sensor, which monitors the actual temperature of the floor surface, and many systems also use an air sensor to monitor room temperature.
Programmable thermostats allow the system to be scheduled around daily routines, warming the floor before the household wakes up and reducing output when the house is empty. Smart thermostats go further, learning usage patterns, responding to occupancy, and allowing remote control via a smartphone app.
Given that UFH is slower to respond than radiators (it can take 30 to 60 minutes to reach operating temperature), scheduling is particularly important. A system left to run reactively will use significantly more energy than one set to a sensible schedule.
Is Underfloor Heating Worth It? Costs, Savings and Lifespan
For tiled rooms in particular, the answer is almost always yes. The combination of tile and UFH is close to ideal: efficient heat transfer, no radiators consuming wall space, and a floor surface that feels genuinely comfortable underfoot rather than cold and hard.
Running costs depend heavily on the system type and controls. Electric UFH in a bathroom, running for a few hours each morning, typically adds a modest amount to electricity bills each month. A whole-house wet system connected to a heat pump can be cheaper to run than a gas boiler with radiators, particularly as energy prices continue to shift.
Electric systems have an expected lifespan of 25 years or more when correctly installed. Wet pipe systems are considerably more durable, with lifespans of 50 years or longer. The thermostat and controls are the components most likely to need replacement over time, and these are straightforward to swap out without disturbing the floor.
Common Underfloor Heating Problems and How to Fix Them
Cold Spots and Uneven Heating
Cold spots usually indicate a gap in the heating mat coverage, a damaged cable, or inadequate insulation beneath the system. If the mat was correctly installed and tested before tiling, a cold spot appearing after installation may indicate a cable fault, which will require professional diagnosis.
Tile Cracking Over Heating Elements
This is almost always caused by one of three things: rigid adhesive that cannot accommodate thermal movement, missing or inadequate expansion joints, or tiling over a system that was switched on too soon. Using the correct flexible adhesive and following the commissioning process carefully will prevent this in new installations.
Thermostat Faults and Sensor Errors
If the thermostat displays an error code, the floor sensor is the most common culprit. Sensors placed in grout lines rather than conduits can be damaged by moisture or heat. A sensor in a conduit can be replaced without lifting tiles. Always check the thermostat manual for specific error codes before assuming a larger system fault.
Is Underfloor Heating Being Banned? What UK Homeowners Need to Know
This question appears frequently, and it deserves a clear, direct answer: underfloor heating is not being banned in the UK. The confusion arises from broader changes to heating regulations, particularly the phasing out of gas boilers in new homes and the government’s push toward heat pump technology.
In fact, underfloor heating is exceptionally well suited to heat pumps. Heat pumps operate most efficiently at lower flow temperatures (typically 35°C to 45°C), and UFH is designed to work at exactly those temperatures. Radiators, by contrast, traditionally required much higher flow temperatures and need to be oversized to work with a heat pump.
Far from being phased out, UFH is increasingly seen as a future-proof heating solution. Installing a wet UFH system now, even with a gas boiler, positions the property perfectly for a heat pump retrofit later. UK building regulations continue to support and encourage UFH installation, particularly in new builds and major renovations.
How Underfloor Heating Affects Floor Height and Door Clearances
This is a practical concern that catches many renovators off guard. Every layer added to a floor build-up raises the finished floor level, and in a retrofit situation, that can create problems with door clearances, transitions to adjacent rooms, and existing skirting boards.
A typical electric UFH mat adds approximately 3mm to 4mm to the floor height. With an insulation board (6mm to 10mm) and tile adhesive (3mm to 5mm) plus the tile itself, the total build-up can easily reach 25mm to 35mm above the original substrate. This may require doors to be trimmed, transition strips to be installed between rooms, and skirting boards to be adjusted.
Planning this before the project begins is far easier than resolving it after the tiles are laid. Measure the existing floor height relative to door thresholds and adjacent floor coverings, then calculate the proposed build-up to check for conflicts. In rooms where height is particularly constrained, ultra-slim insulation boards and low-profile heating mats can help minimise the overall increase.
Frequently Asked Questions About Underfloor Heating
What are the downsides of underfloor heating?
The main downsides are the higher upfront installation cost compared to radiators, the slower warm-up time (particularly relevant if the system is not on a schedule), and the increase in floor height that can affect door clearances. For tiled floors, the requirement for flexible adhesives and expansion joints adds a small amount of complexity and cost to the tiling process.
Is underfloor heating very expensive to run?
It depends on the system and how it is controlled. Electric UFH in a small bathroom, used on a schedule, is very affordable to run. A whole-house electric system used without smart controls can be costly. Wet systems connected to a heat pump are among the most efficient heating options available. Smart thermostats make a significant difference regardless of the system type.
Is underfloor heating really worth it?
For tiled rooms, almost certainly yes. The combination of tile and UFH delivers excellent thermal performance, eliminates the need for radiators, and provides a noticeably more comfortable floor surface. The installation investment is typically reflected in improved comfort, lower long-term running costs (with the right controls), and added property value.
Is it cheaper to run radiators or underfloor heating?
A wet UFH system connected to a heat pump will generally be cheaper to run than gas radiators. Electric UFH in small areas is comparable to or slightly more expensive than gas radiators, but the comfort benefit is considerable. The key variable is how well the system is controlled: a poorly scheduled UFH system will always cost more than a well-managed radiator system.
What is the lifespan of underfloor heating?
Electric heating mats typically last 25 years or more. Wet pipe systems, being inert plastic pipes embedded in screed, can last 50 years or longer. The thermostat and controls have a shorter lifespan (typically 10 to 15 years) but are easy and inexpensive to replace.
How long does installation take?
An electric mat system in a single room can be installed and tiled within a day or two, though the adhesive and grout must cure before the system is commissioned. A wet system is more involved and may take several days for a single room, longer for a whole house. The commissioning process (gradually increasing temperature) should be factored in as well.
Underfloor heating and tiled floors are a genuinely excellent pairing. With the right preparation, the correct materials, and a careful approach to installation, the result is a floor that performs beautifully and lasts for decades. The key is in the details: the right adhesive, the right expansion joints, and a properly managed commissioning process. Get those right, and the finished floor will be one of the most satisfying results any home improvement project can deliver.
Article written by Casper